How to backstitch: a guide to clean outlines and lettering
Backstitch turns coloured areas into a picture: it draws outlines, faces and letters. It is quickly learned, but it only looks good when the line is even.

What is a backstitch?
A backstitch is a continuous line of short, straight stitches. Each stitch joins the previous one because you stitch backwards on the front. On a chart it appears as a solid line along the squares or across them.
How to work the backstitch
- Come up one stitch length ahead of the start of the line.
- Go down backwards at the start of the line.
- On the back, travel forward two stitch lengths and come up again.
- Go down backwards into the end of the previous stitch, and so on.
Always go down exactly into the hole where the previous stitch ends. Every gap shows later as a break in the line.
When, and with how many strands?
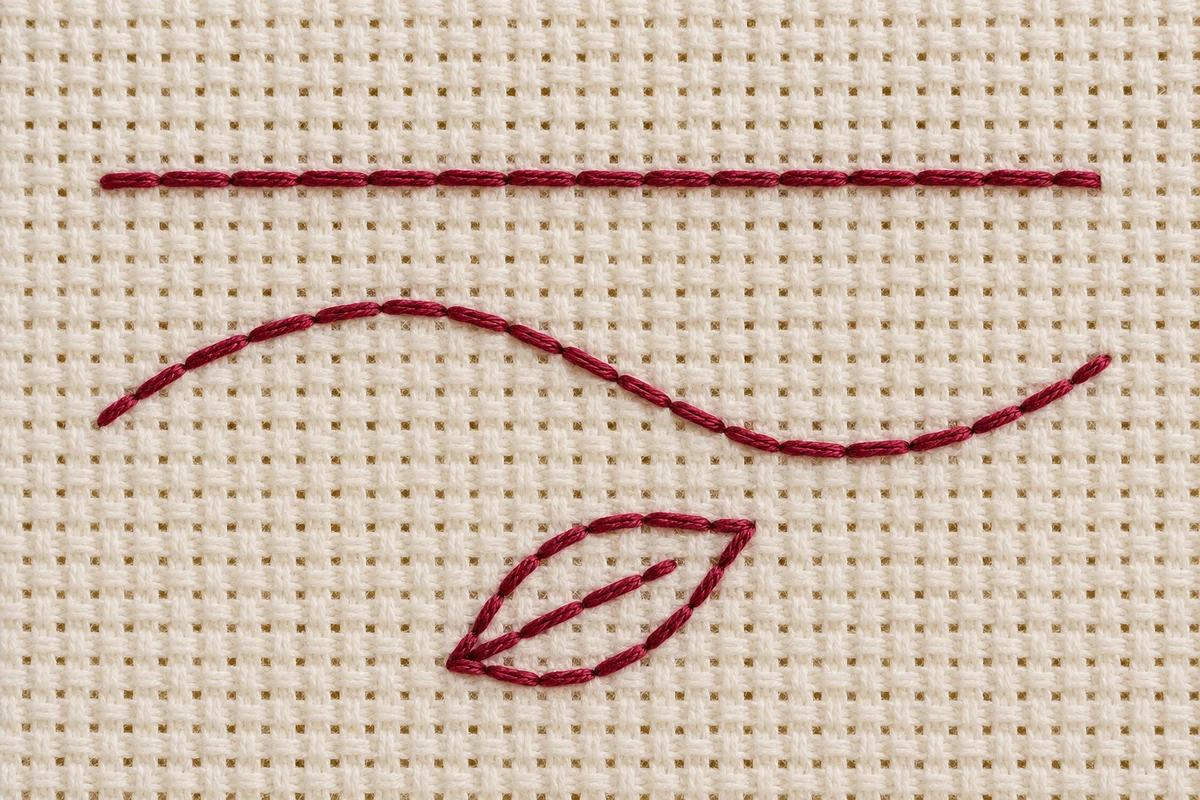
Work the backstitches only once all cross stitches are finished. They sit on top and would otherwise be stitched over. One single strand is usual so the line stays fine. For bold outlines or lettering, use two.
Curves, diagonals and lettering
- Curves: prefer many short stitches over one square to a few long ones. Long stitches turn a curve into a polygon.
- Diagonals: follow the chart. A stitch may run diagonally across one or two squares.
- Lettering: stitch every letter on its own and finish off in between, rather than carrying the thread across the gap.
The most common mistakes
- Thread carried across open areas on the back: dark thread shows through light fabric. Finish off and start again.
- Pulled too tight: the line cuts into the cross stitches. Pull only until the thread lies smooth.
- Uneven stitch lengths: keep to one length, usually one square.
Reading backstitches on a chart
On a chart, backstitches are lines that lie over the grid. They start and end at the corners of the squares, which are the holes in the fabric. The colour of the line is given in the key; in black-and-white charts every line colour has its own label.
Planning and ticking off backstitches on xstitchr
- In the pattern designer you draw backstitches yourself: click the start and end points on the grid intersections, choose the thread colour, done.
- The converter adds outlines automatically on request when it turns a photo into a pattern.
- In the stitching editor the lines lie over the grid. With the backstitch tool you tap a finished line to tick it off, so you keep track even with many outlines.
- In print the backstitches appear as lines, in black and white with the labels B1, B2 and so on plus the thread number in the key.
xstitchr estimates the thread for the lines in metres, calculated for one strand on 14 count. For outlines one skein of the backstitch colour is almost always enough.
Frequently asked questions
Do you backstitch before or after the cross stitches?
After. The backstitch lies on top of the cross stitches and gives them their outline.
How many strands do you use for backstitch?
Usually one. Use two strands when the line should be bold or the chart says so.
How are backstitches shown on a chart?
As solid lines over the grid, from corner to corner of the squares. The thread colour of the line is given in the key.
Can I draw backstitches into my own pattern?
Yes. The xstitchr pattern designer has a dedicated tool for this, and the converter can add outlines automatically.
What is the difference between backstitch and running stitch?
A running stitch leaves gaps between the stitches, while in backstitch every stitch joins the previous one and forms a continuous line.