How to do a French knot: step-by-step tutorial with pictures
The French knot has a reputation for driving stitchers mad: sometimes it slips through the fabric, sometimes it ends up as a loose loop. In truth it takes four small moves and one single rule. Here you learn both.

What is a French knot?
The French knot is a small raised dot of embroidery thread. You wrap the thread around the needle and go back down right next to where you came up. The result is a firm knot that sits on top of the fabric.
In cross stitch it shows up wherever a full cross would be too coarse: eyes, flower centres, berries, stars, snowflakes or the dot on an i.
What you need
- Embroidery thread, for example two strands of stranded cotton
- A sharp needle with an even shaft. A blunt tapestry needle works too, but the wraps slide less easily over the eye.
- An embroidery hoop. Taut fabric is half the battle, because you need both hands.
French knot tutorial in 4 steps
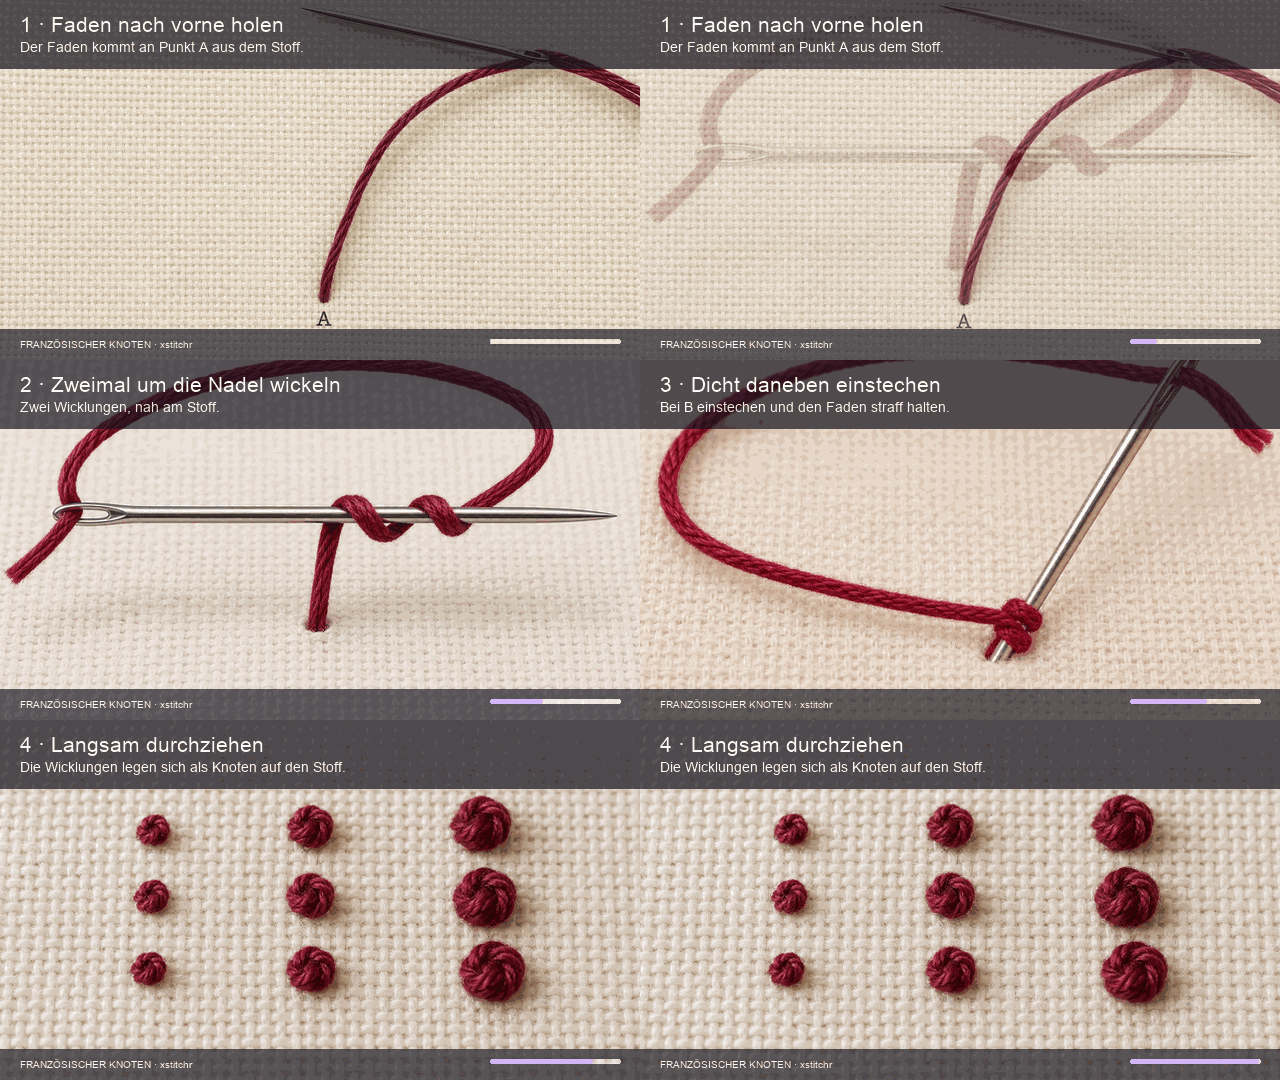
Step 1: Bring the thread to the front
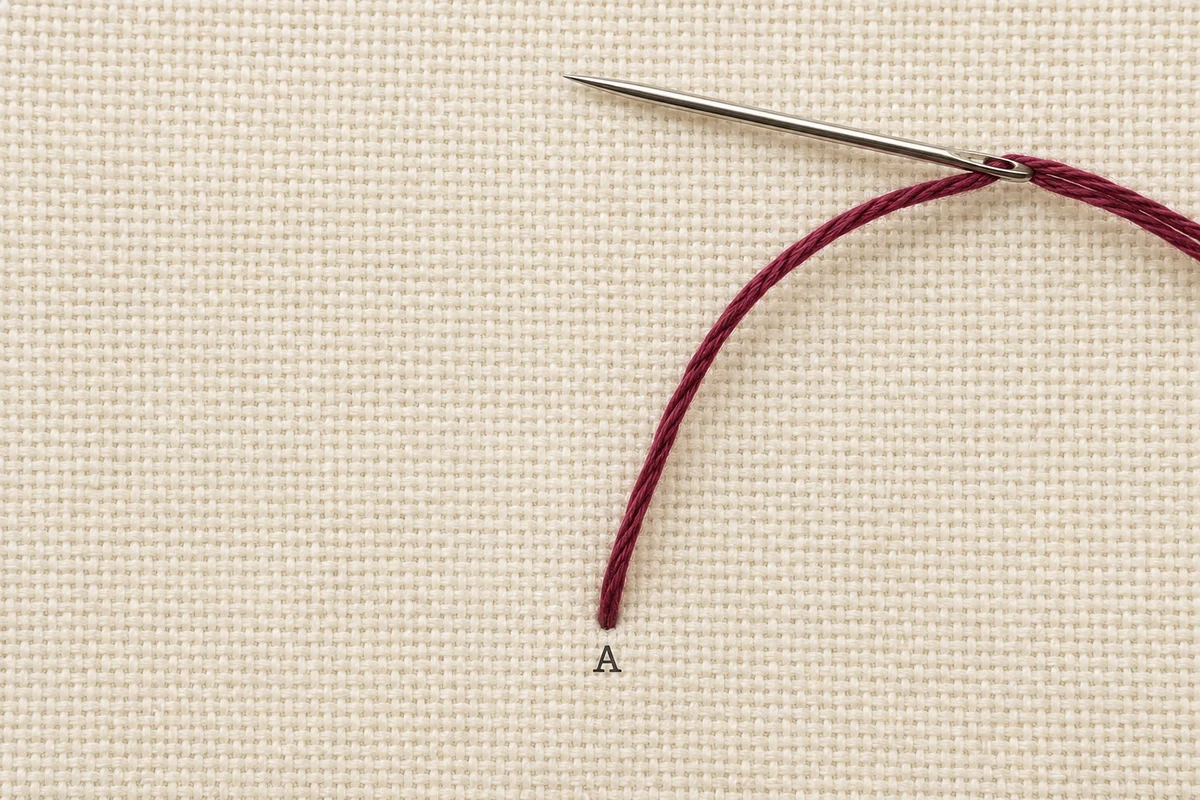
Come up from the back at the spot where the knot should sit and pull the thread all the way through. Secure the tail well on the back, otherwise the knot will come undone later.
Step 2: Wrap twice around the needle
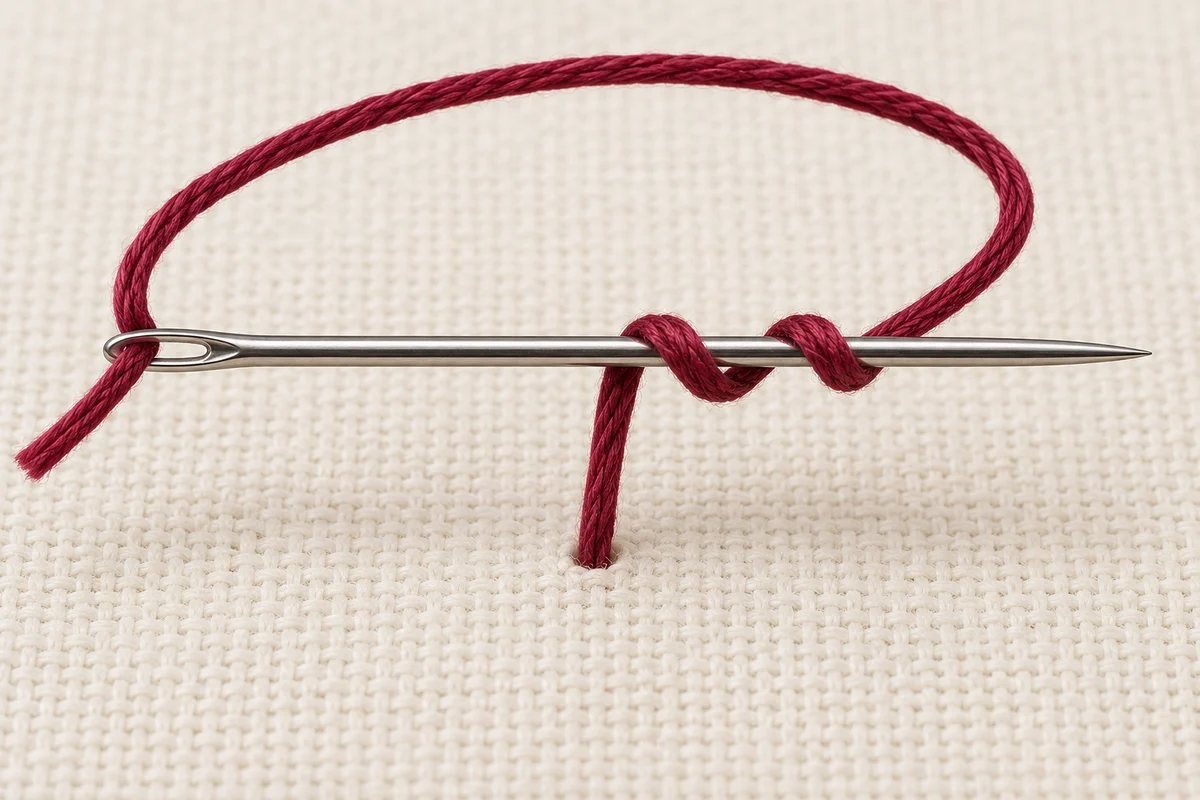
Hold the thread taut with your free hand about two inches above the fabric. Place the needle in front of it and wrap the thread twice around the needle. Wrap close to the fabric, not high up in the air.
Step 3: Go down right next to it
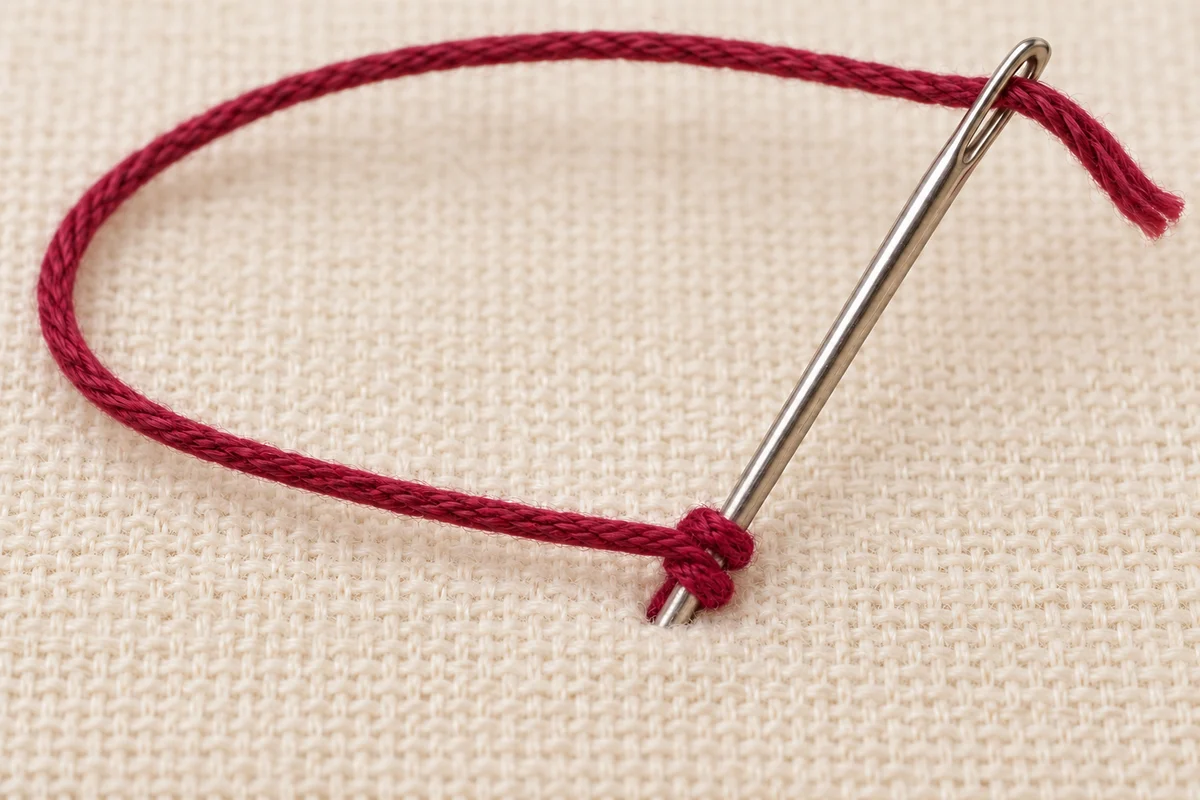
Insert the tip of the needle very close to where you came up, but not into the same hole. Now pull the thread in your free hand until the wraps sit snugly around the needle at the fabric.
Step 4: Pull through slowly
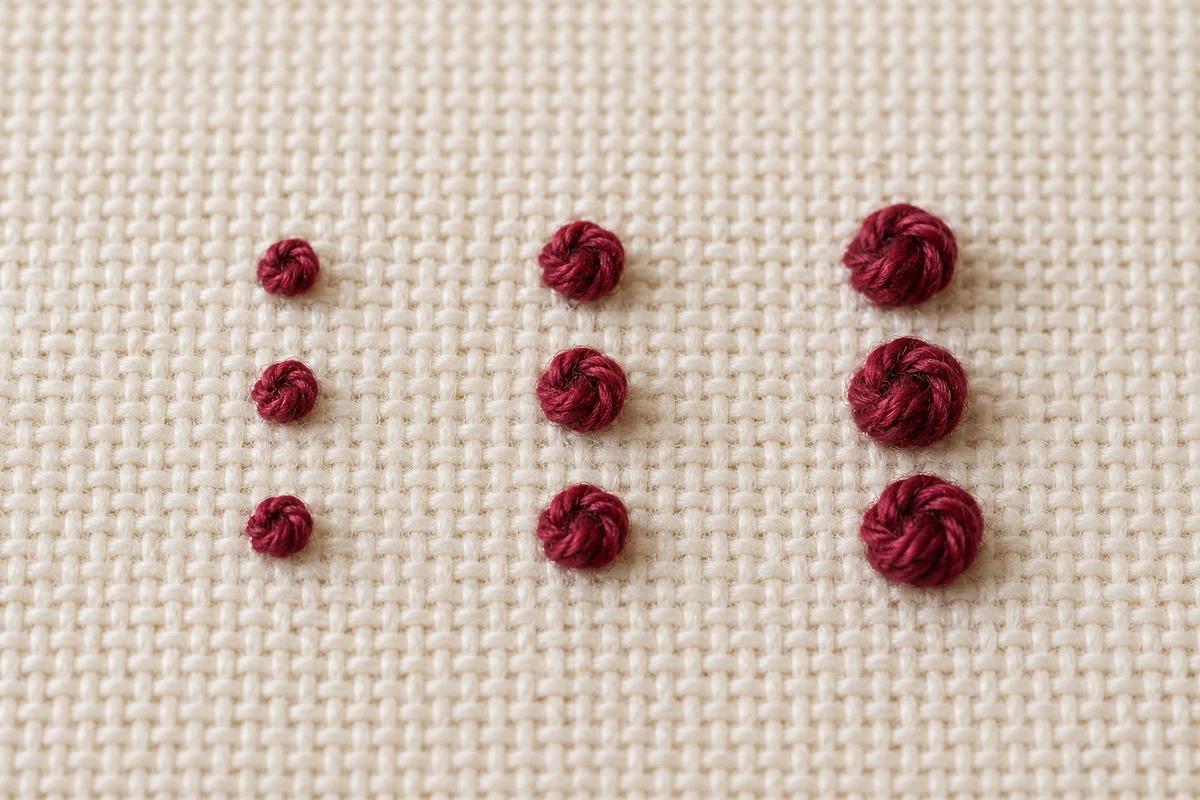
Pull the needle slowly through to the back and only let go of the thread when it is almost all the way through. The knot settles onto the fabric. Done.
The one rule: the thread stays taut until the knot is seated. Almost every failed knot is a thread that was let go too early.
The 5 most common mistakes and how to avoid them
The knot pulls through the fabric
You went back down into the same hole. Go down one fabric thread away instead. On Aida, pierce the block or use the neighbouring hole.
The knot is a loose loop
The thread was not taut while you pulled through. Hold on to it until only a short length is left.
The needle gets stuck
The wraps are too tight or the eye of the needle is thicker than its shaft. Wrap a little more loosely or use a needle with a slim eye.
The knot looks messy
Usually there are too many wraps. From the third wrap on, the knot tends to tip over. Stick with two.
The knots come out in different sizes
Always use the same number of strands and the same number of wraps, and pull the thread equally tight every time.
How many strands and wraps?
You control the size with the number of strands, not the number of wraps. Two wraps give the neatest, roundest knot.
- 1 strand, 2 wraps: a tiny dot, for example for the eyes of small figures
- 2 strands, 2 wraps: the standard for flower centres and berries
- 3 to 4 strands, 2 wraps: bold knots for snowflakes or textured areas
French knots in cross stitch and on Aida
Stitch the knots at the very end, once the cross stitches and backstitches are done. That way your thread does not catch on them and the hoop does not flatten them.
The holes in Aida are large. If the knot keeps slipping through, pierce the middle of a block instead of using a hole. On linen and evenweave, one fabric thread of distance is enough.
On a chart, French knots usually appear as small filled dots, often with their own colour in the key.
Alternatives when it just will not work
- Colonial knot: the thread is laid around the needle in a figure of eight. It sits more firmly and is more forgiving.
- Seed beads: a small bead in a matching colour looks almost the same and is always the same size.
- A tiny cross stitch over one fabric thread: flat, but tidy.
Frequently asked questions
Why does my French knot pull through the fabric?
Because the needle goes back into the same hole the thread came out of. Go down one fabric thread away and the knot has something to hold on to.
How many times do you wrap the thread for a French knot?
Twice. Once gives a very small knot, three times or more tends to look untidy. For bigger knots, use more strands.
Can you make French knots with a cross-stitch needle?
Yes. A blunt needle works if you go down into a hole or right beside one. A sharp needle with a slim eye makes it easier.
When do you stitch the French knots in a cross-stitch piece?
Last of all, after every cross stitch and backstitch. Then they do not get flattened and are not in the way while you stitch.
What is the difference between a French knot and a colonial knot?
For a French knot the thread is wrapped in one direction, for a colonial knot in a figure of eight. The colonial knot is slightly larger and comes undone less often.